
Precision Editing: Master Image Marking in Nanobanana Pro
Image Marking allows you to guide AI edits with visual cues by pointing to specific areas. Learn how to use this powerful feature step-by-step for surgical precision in your image transformations.
Change only what you want — exactly where you want it.
When editing images with AI, a common frustration is the "global change" problem: you want to tweak one small detail, but the AI ends up modifying the entire composition.
Image Marking solves this by allowing you to provide direct visual guidance. By marking specific areas of your image, you tell the AI exactly where to focus its creative power.
🌟 Pro Exclusive: This advanced feature is available exclusively in Nanobanana Pro.
Ready to experience surgical precision in your creative workflow? Try it now and see the difference.
What is Image Marking?
Image Marking allows you to layer visual references directly onto your source image:
- Annotate with Text: Write labels like "bird," "car," or "window" directly on the canvas.
- Visual Cues: Draw simple marks or lines to indicate target areas.
This dual-input approach (text + visual cues) ensures the AI understands both what to change and where the change should occur, giving you unprecedented control.
Practical Example: Adding a Bird with Precision 🐦
Let’s walk through a real-world scenario: adding a bird to a specific branch in a landscape photo.
Step 1: Upload Your Source
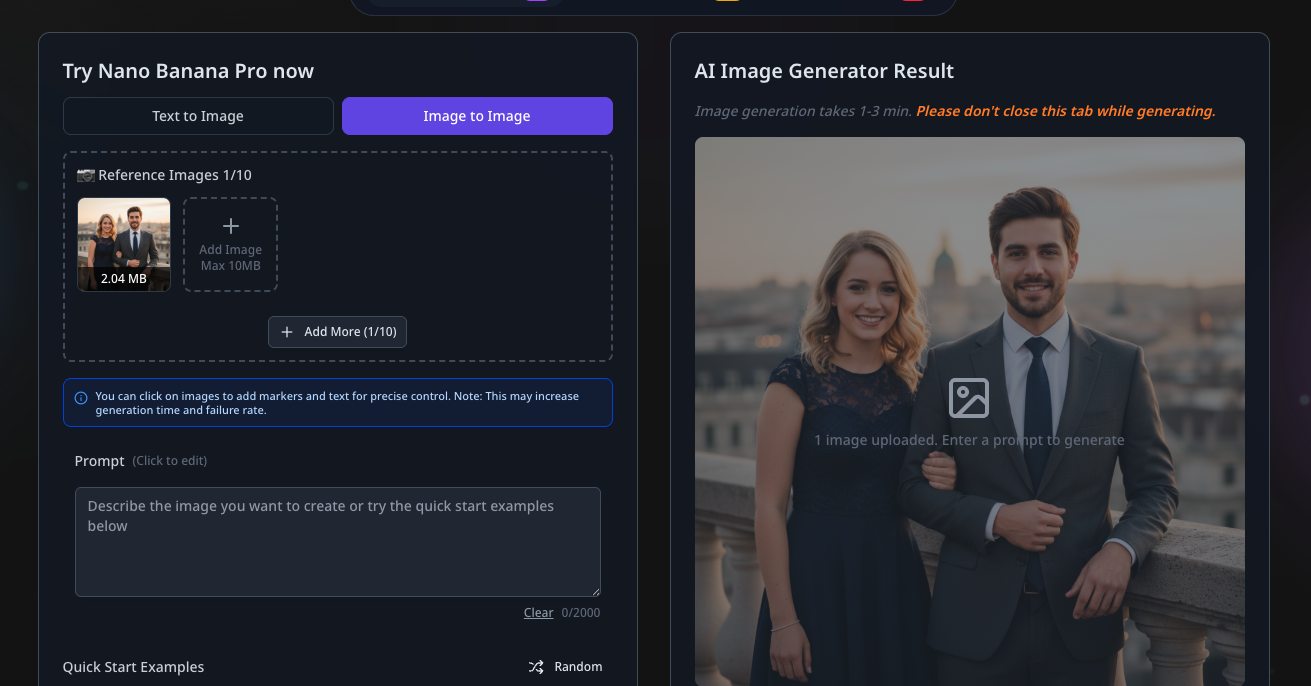
Switch to Image to Image mode and upload the base image you wish to transform. This works for portraits, landscapes, or complex commercial shots.
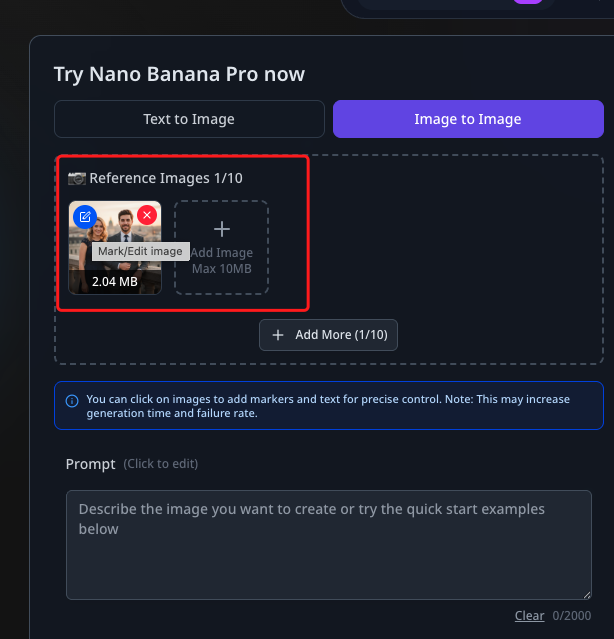
Step 2: Launch the Editor
Once uploaded, click the Edit button on the image thumbnail to open the dedicated Image Marking panel.
Step 3: Define the Location
Inside the marking panel:
- Navigate to the exact spot where you want the new element to appear.
- Write the word "bird" or draw a simple circle around the area.
- Click Done to lock in your visual reference.
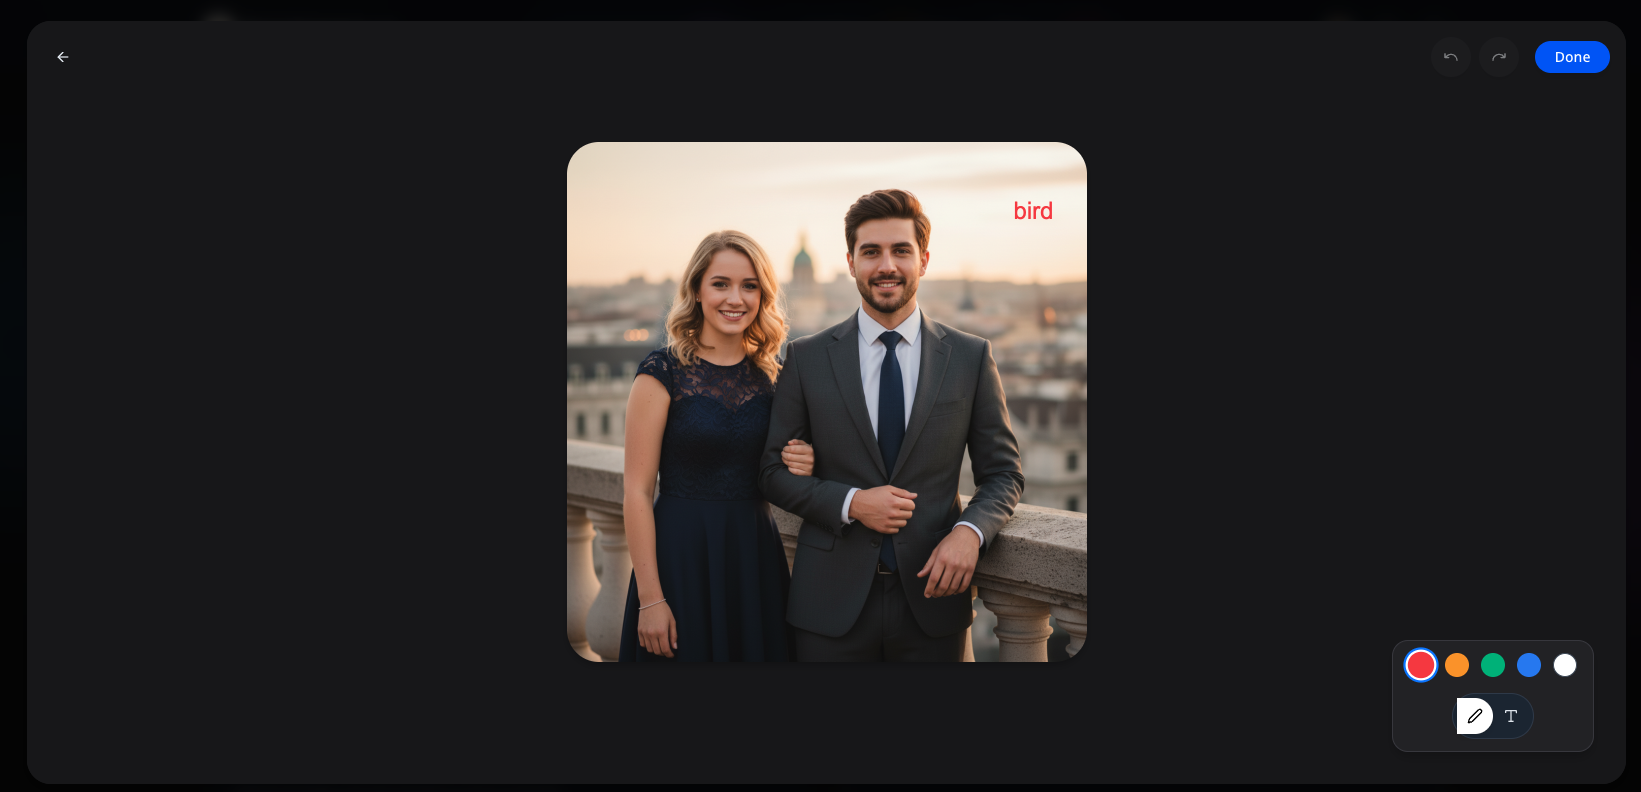
Pro Tip
Don't worry about artistic precision in your marks. Clear positioning is far more important than the quality of your drawing.
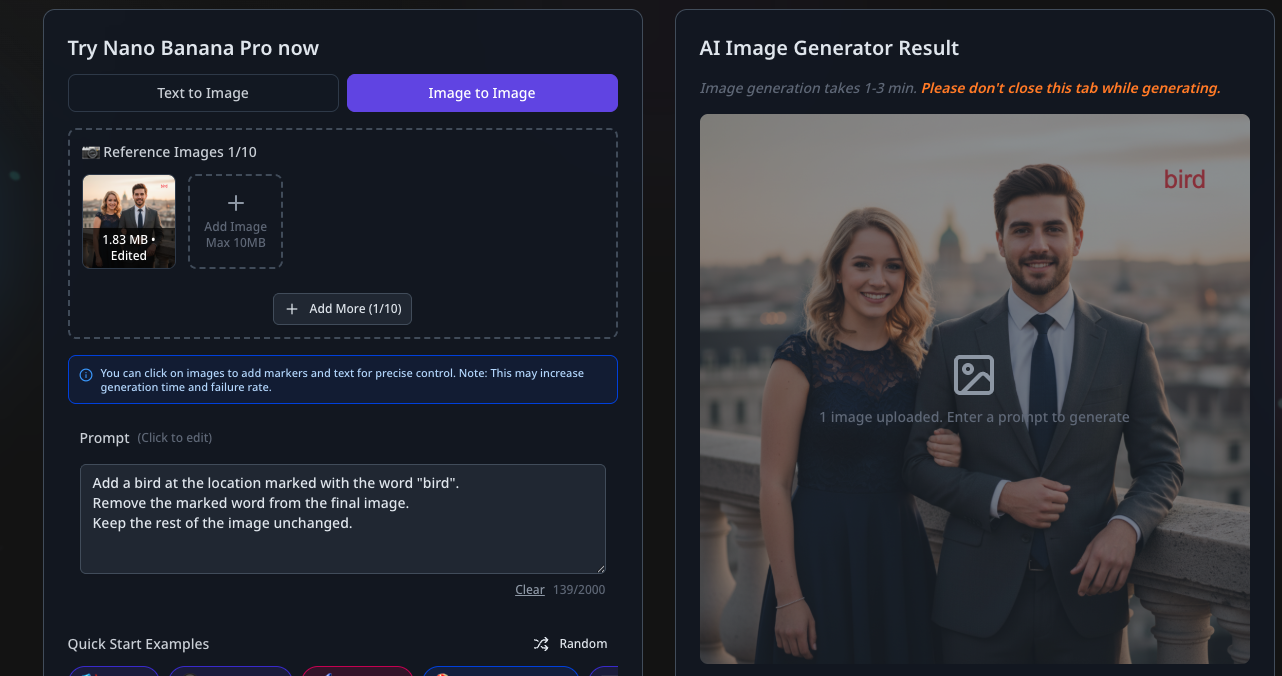
Step 4: Craft the Prompt
Return to the generator and enter a prompt that references your marks:
Add a realistic bird at the location marked with the word "bird".
Ensure the marked text is removed from the final output.
Keep the rest of the image, lighting, and composition unchanged.
This instruction tells the AI to use your visual mark as the primary spatial anchor for the generation.
Step 5: Generate and Review
Click Generate and watch the AI execute your surgical edit.
The Result:
- A bird appears exactly where you marked.
- The background, other subjects, and overall style remain perfectly preserved.

Why Use Image Marking?
Compared to traditional text-only prompts, Image Marking offers three core advantages:
- Absolute Positioning: No more struggling to describe locations like "the third window from the left on the second floor." Just point and click.
- Minimized Randomness: By anchoring the AI to a specific zone, you prevent unwanted changes to the rest of your image.
- Control Over Complexity: In busy images with multiple elements, Image Marking provides the clarity the AI needs to avoid confusion.
Pro Tips for Best Results
To get the most out of Image Marking, keep these best practices in mind:
- Simplicity is Key: Clean, simple marks usually lead to the most stable and predictable outputs.
- Use Sparingly: Only use marks when precise spatial control is necessary. Over-marking can sometimes confuse the model's contextual understanding.
Note on Performance
Because Image Marking adds a layer of spatial guidance, generation times may be slightly longer than standard edits. In rare cases, extremely complex markings may increase the likelihood of a generation error.
If the result isn't perfect, try:
- Simplifying your visual marks.
- Making your text prompt more descriptive.
- Reducing the number of simultaneous marked areas.
Final Thoughts
Image Marking evolves AI editing from "guessing your intent" to "following your exact instructions." It is the ultimate tool for creators who demand total control over their visual assets.
Image Marking is perfect for:
- Adding elements to exact coordinates.
- Modifying specific textures or objects without affecting the scene.
- Reducing the "trial and error" cycle of AI generation.
Image Marking makes Nanobanana Pro the definitive choice for professional-grade AI image manipulation.
Author

Categories
More Posts

Behind the Scenes of Nanobanana
Explore the engineering behind Nanobanana, powered by Gemini 2.5 Flash. Learn how character consistency, interleaved generation, and native multimodal architecture are redefining AI image creation.

Nanobanana User Guide: Master AI Image Transformation
A comprehensive guide to leveraging Nanobanana's advanced AI image editing platform. Learn to create stunning visuals with natural language prompts, master character consistency, and unlock the full potential of Gemini 2.5 Flash.

Nanobanana vs. Seedream 4.0: A Practical Comparison for Creative Professionals
An in-depth analysis comparing Nanobanana's advanced AI image transformation capabilities against Seedream 4.0. Explore real-world creative scenarios, performance benchmarks, and workflow efficiencies to find the right tool for your project.